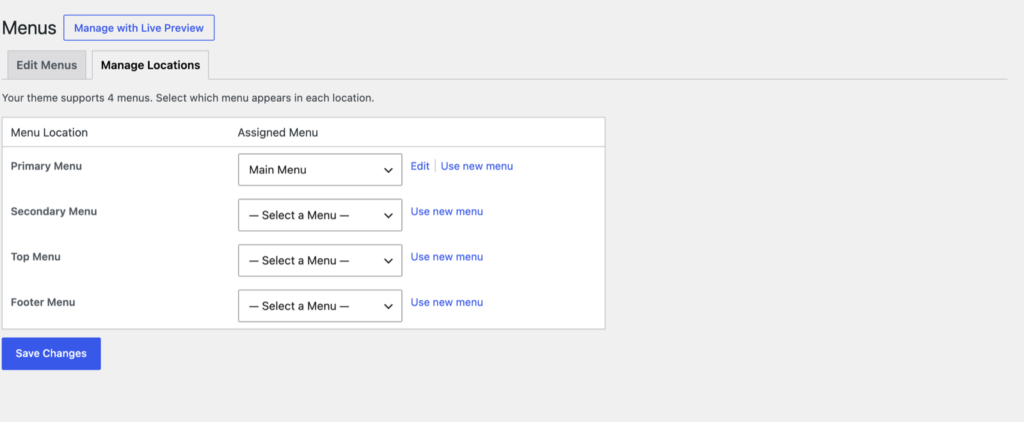
Menus are managed in Appearance → Menus. The theme has four menu locations:
- Primary Menu: the main menu of the header.
- Secondary Menu: the menu of the header’s secondary row (in the header layouts that have one).
- Top Menu: the links of the Top Bar, e.g. the account links.
- Footer Menu: the links of the footer’s bottom row.
To assign a menu, open the Manage Locations tab, pick a menu for each location and click Save Changes.
Mega menu
Any top-level item of the Primary Menu can open a mega menu:
- Edit the top-level item and check Mega Menu?.
- Its sub-items become the columns of the mega menu, with their labels as the column titles and their own sub-items as the links.
- To show widgets in a column instead, edit the column’s item and choose a Mega Menu Widget Area, then add widgets to that area (Megamenu Widget Area 1 to 4) in Appearance → Widgets.
Account links in the Top Menu
With the Nav Menu Roles plugin (installed with the theme), menu items can show only to logged-in or logged-out visitors:
- Create a menu, e.g. Top Menu, and assign it to the Top Menu location.
- Add the My Account page, change its label to Register and set Display Mode to Logged Out Users.
- Add the My Account page again, label it Login, also for Logged Out Users.
- Add the My Account page once more for Logged In Users.
- Add a Custom Link to
[site-url]/my-account/customer-logout/labeled Logout, for Logged In Users. You can add the CSS classnav-account__item--logoutto style it differently.
The logout address is set in WooCommerce → Settings → Advanced → Account endpoints; it’s usually /my-account/customer-logout/.
The Hockey design shows an account menu (a helmet icon) beside the search instead, with the WooCommerce account pages, so it doesn’t need these links.