To setup the menus, navigate to Appearance -> Menus. Enter a name for your menu and add links to the menu by using the options given on the left sidebar. You can manage your menus using the drag and drop functionality. After setting up your menu, select the menu you just created from the theme locations dropdown box and hit the “Save” button.
To get more information on how to setup menu in WordPress 3.x, see http://codex.wordpress.org/Appearance_Menus_SubPanel
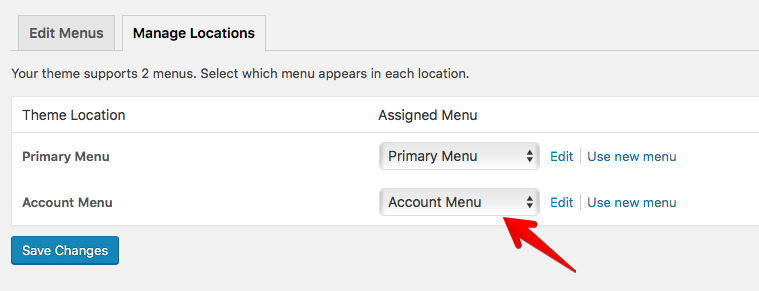
Note! If the menu does not appear as the livedemo, go to Appereance > Menus and select the following:
Primary Menu -> Primary Menu,
Account Menu -> Account Menu
Account Menu
Please make sure that you have installed next plugins:
- Nav Menu Roles (required)
- Clean Login (required)
Once you’ve installed and activated “Clean Login” plugin, go to “Pages” and create 4 pages with “Full width” page template and add next shortcodes:
- Login –
[clean-login]to create login form - My Account –
[clean-login-edit]to create an edit profile form - Register –
[clean-login-register]to create a registration form - Restore –
[clean-login-restore]to create a forgotten password and restore form
Creating Account Menu
To create Account menu, click the “create a new menu” link, enter menu name, and click the “Create Menu” button. To assign the menu to the menu locations, click the “Manage Locations” tab then select your menu from the drop-down under “Assigned Menu” and then click the “Save Changes” button.
Adding Menu Items
Select your recently created “Account Menu” and add next pages:
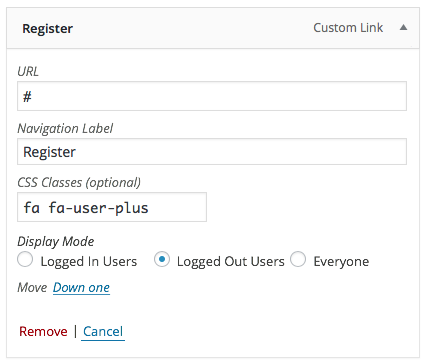
- Register
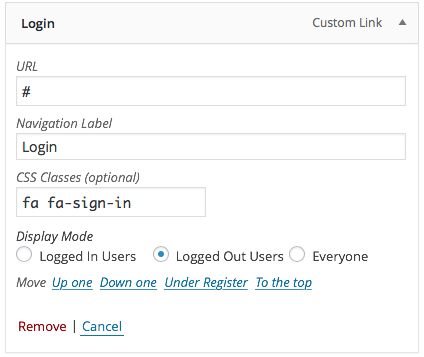
- Login
- My Account
Now you need to hide menu items based on user roles. Choose next settings for menu items:
- For Register item choose “Logged Out Users” display mode
- For Login item choose “Logged Out Users” display mode
- For My Account item choose “Logged In Users” display mode
Also you can add icons for menu items. But first you need to add a custom CSS class to it. To enable this, navigate to “Appearance” > “Menus”. On the top right of the screen click “Screen Options”. Once the options are expanded click “CSS Class”.
Add next classes to menu items to add icons
- For Register add class
fa fa-user-plus - For Login add class
fa fa-sign-in
Adding Sub Menu Items
Add next sub menu items to “My Account” menu item:
- Edit Jobs – use page with
[job_dashboard]shortcode. - Edit Resumes – use page with
[candidate_dashboard]shortcode. - Logout – use custom link with next structure:
LINK_TO_YOUR_LOGIN_PAGE/?authentication=success&action=logout. It means you need to copy your link to your login page (see above) and then add this code to it?authentication=success&action=logout
Addin Woocommerce Sub Menu Items
If you’re using “WooCommerce” and “WC Paid Listings” add-on you may want to have items for Cart, Orders, Edit Address etc. It’s very easy to do. Just make sure that you have Woocommerce pages or create them from scratch and add them using instruction above.